

articles/Spring/springupon
Spring is upon us
by Jon Ashton

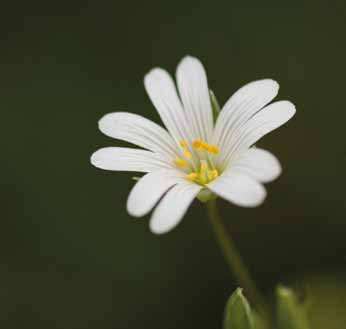
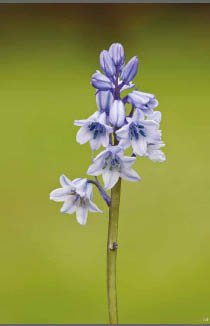
Well spring is upon us, the birds are active, many have already begun nesting, mammals are chasing one another, that can only mean one thing - and no it's not all about big lenses, this time of year offers so many and different potential subjects - we have birds all year round but now we have many more subjects suited to shorter lenses, yes it's macro time.
I am using the term macro rather loosely perhaps, close up is suitably vague or general, I hope to show you something of the range of subjects that will become available to you.
Spring is the time to consider a veritable cornucopia of subjects. Let's have spontaneous thought over the possibilities that we have:
Plants eg woodland flowers Insects eg bumble bees, flies, beetles, bugs, butterflies and damselflies Amphibians eg frogs, toads and newts Reptiles eg lizards, snakes and slow worms Mammals eg mice, voles, shrews - even grey squirrels The previous is by no means intended be an exhaustive list but I hope it will help engage the grey matter into thinking about the range of possibilities open to you. I would suggest thinking about what may be in your garden now, as you read this article, then let your mind wander to your most frequent walks and then onto more specific locations or habitats where you would find items in the natural world that you always wished you had captured but never did - there is always something to photograph and improve upon.
Lens choice
Since my last macro article was written in June 2008 there are now several new lenses on the market. The table below gives an indication of the availability of current lenses.
I won't go into detail over the merits of individual lenses, they are all capable of providing excellent image quality, but I offer the following guidelines:
• Longer focal length lenses are generally more expensive.
• Longer focal length lenses are generally more suited to insect and animal photography because they offer a longer working distance (ie distance from the front of lens/lens hood to subject).
• Longer focal length lenses are heavier than short focal length lenses.
• Shorter focal length lenses are better suited to indoor photography.
• Shorter focal length lenses are usually better suited to plant photography.
A word of caution: most of the above lenses can be used with full frame and crop frame digital SLRs, but some are only suited to crop SLRs; if you are buying a new lens check the compatibility with your camera(s).
Image stabilisation
Image stabilisation has potential, both good and bad! Image stabilisation obviously comes into its own if you are hand-holding or using a monopod. I would, however, suggest that the sharpest images are made when using a tripod and mirror lock up, with or without a cable release.
Call me old fashioned but I still adopt the maxim that things are sharpest when they are still and "there is nothing more still that static" - hence the tripod. Image stabilisation offers improved opportunities when stalking insects, and very good results may be obtainable, but in general I would recommend at least using a monopod and when/where at all practicable using a tripod - and a reasonably heavy one - light ones are not stable enough in rough grasses. On the one hand (no pun intended) handholding a camera offers the opportunity to get more images, some of which will be good, and possibly some very good indeed, but using a tripod, by necessity slows you down. It makes you consider composition and the plane in which you are taking the image, it can even remind you to check aperture and shutter speed and provide you with the opportunity to use a lower ISO setting. The tripod will give you fewer images but I think you will end up with more genuine 'keepers'.
Tripod head
Let's assume we have got the camera lens and tripod, the next thing to consider is the tripod head. I think there is some considerable room for manoeuvre here, probably the deciding factor will be the depth of your pocket. According to Manfrotto's website "Manfrotto's 405 Pro Digital Geared Head is designed especially to meet the more exacting, timesensitive needs of today's busy professional digital photographers who shoot with medium format or 35mm camera/back payloads up to 16.5lbs.
The 405 utilizes large, easy-to-grip knobs that provide smooth, positive, geared control through 360° pan and +90° - 30° frontal and lateral tilt. In addition to its 3-D geared functions, the 405 also incorporates a unique feature that allows you to instantly disengage the gears and rough position the camera by hand, then instantly reengage them for ultraprecise final alignment". I have highlighted the last few words, it is this last adjustment in terms of macro composition that results in a winner, as opposed to a highly commended image. Your editor has a 405 and says it is one of the best things he ever bought!
Having said that, both he and I have managed in previous years with a variety of heads ranging from ball and socket, to pan and tilt. Strangely enough I have standardised on my Mongoose head, (it is a lightweight gimbal-type head) the reason being that when I went to The Gambia I needed to minimise weight so I bought the Arca Swiss Plate for my 180mm macro lens, and zoom lens; this meant I could go from 180mm macro to 100-400mm zoom to 500mm telephoto using the same tripod and head; shorter lenses I hand-held. I would urge anyone with a gimbal head to try it for macro work, I find mine very manoeuvrable and fast to use.
Ball and socket heads are very quick and relatively light, the main drawback with them is the inability to readily make fine adjustments - this of course is where the geared head excels, I make no apology for mentioning this twice.
The weather
Breezy weather is probably one of the most irritating problems for the macro photographer, there are several ways to deal with this:
1. Wait until the breeze drops
2. Employ a cover or cloche of some description
3. Anchor the subject
4. Take the subject indoors
Option 1 is self explanatory but sometimes it is not practicable.
Option 2 can be useful when taking images of small flowers and sometimes insects, though care must be taken to ensure the cover does not harm you subject or impart a colour cast or become visible in your image.
Option 3 is often the most practicable solution. There are a variety of ways your subject may be rendered still, for example a piece of wire may be adequate or perhaps take an old knitting needle and clothes pegs.
There are more sophisticated clips and clamps that may be purchased, some of which are rather expensive but I do find Speedgraphic a good source, several items here are not too expensive: (www.speedgraphic.co.uk/closeup__macro/supports__brackets/90_0c.html )
I have used the Novoflex Klammer for several years now: (www.speedgraphic.co.uk/supports__brackets/novoflex_klammer_small_clamp/8430_p.html) Option 4 can be a perfect solution provided your subject does not suffer in any way and provided it is returned to whence it came in a safe manner.
Here you can have the luxury of taking your time and making the most of all the props and supports you may have. Equally you are able to set up nicely muted backgrounds and you are also able to control the light through the use of reflectors and/or flash guns.
The light
One of the biggest problems, apart from wind, is a lack of light or light coming from the wrong direction. Small lightweight reflectors are very useful here, they can be held in one hand whilst firing the cable release with the other or, subject permitting, you can set the camera to time delay and hold a reflector in each hand. I have a small Lastolite, but I also have a couple of reflectors made from disposable metal foil from takeaway meal containers.

Flash, of course, can prove very useful - provided it is used in a complimentary manner. From my perspective, a successful image using flash would be one in which it was in no way apparent that flash was used.
I use it just to fill in any shadows and eliminate potential colour casts. In general if the image is going to be taken at flash synchronisation speed or slower I use the flash at -1.66 EV. If I am using faster shutter speeds I remember to use High Speed Synch Flash or alternatively I use manual flash at a lower power setting - I would suggest 1/16 power as a starting point. I always use a Stofen flash diffuser this provides even, diffused lighting , it is also a relatively cheap accessory - I highly recommend it. The aforementioned guidelines apply to an old Canon 550 EX flash gun, check the guide number of your gun and set it accordingly.
Ok, we have the photographic gear to go and capture images but before we go charging off let's consider a couple of things first. I think it pays to be decisive, so whilst it can prove useful to take all your photographic gear with you, it makes sense to consider precisely what your intentions are for the day and thus optimise your load.
Other Accessories
Filters, I use only one and that sparingly; it is the polarising filter. I find this useful when taking shots near water or when chitinous bodies reflect a lot of light. The main problem is that it is difficult to rotate the filter when the lens hood is in place and I do not like using any lens without a lens hood. I find a rucksack type bag more useful, this means I can take it with me and I don't have to keep putting it down, (for example if you are in an area where there may be other people you would want to keep your equipment close by), also the terrain may be such that placing a bag on water-logged ground would not be such a great idea.
Plastic bags or kneeling mats are very useful items to have with you,
especially in wet or marshy areas. I have tried knee pads but generally speaking I have found them less than perfect, tending to slip out of position or become water-logged.

If the subject lends itself to it (say an emerging dragonfly) I would consider taking a small, second tripod to which I attach the Novoflec Klammer - this enables me to place the piece of reed or grass in optimal light and with a complimentary background.
Clothing
You don't have to wear camo gear but clothes in muted colours are much less likely to draw the attention of insects than brightly coloured ones, it is also a good idea to wear long sleeved garments and consider wearing dark gloves, though I generally do not find the latter essential. If you have a head like mine, however, I would suggest some head gear partly to shield yourself from UV light and partly not to dazzle the insects with reflected light!!
Maybe I shouldn't admit this but at this point I check the camera has a compact flash card in it, and the batteries are good and I also check it is set to Av mode. I make a preliminary decision over the light, ie is it an ISO 100, 200, 400 or 800 day and set the camera accordingly. I make these preliminary decisions so that I know that if I fail to optimise the camera before I start shooting then I know that the chances are I will at least have an acceptable image to start with. Incidentally if you have not done much macro photography I think you will be in for a pleasant surprise in regard to ISO settings. Obviously some cameras are better than others in terms of restricting noise at higher ISO, but if you compose in such a manner that there will always be minimal or no cropping and you 'expose to the right' you will generate less noise. By exposing to the right I mean risk having a few 'blinkies' showing when you look at your image preview.
Remember the image preview is a guide and it is a JPEG and not the RAW file - keep an eye on the histogram. I know you can't do this for every shot but having done it for one you will soon get to know if a butterfly is a plus or minus or neutral exposure when on a light or a dark flower.

I am not suggesting that you grossly over expose but if you are fully exposing the image you will minimise your noise levels and you will also be generating larger files (if you don't believe me try it!) larger files means more information.
Approaching the subject
If you are photographing insects it pays to move slowly and smoothly and make the final approach particularly slowly, perhaps taking a couple of initial images as you get closer. Keep a close eye on the vegetation, the last thing you would want to do is to get within shooting distance and then place your foot, monopod or tripod leg on the plant upon which the subject is resting. If you cast a shadow try to approach so your shadow does not fall on the subject, because if it does there is a good chance it will fly off. In general it is a good idea to go out early or later in the day rather than around the hotter hours; there are for several reasons for this:
1. The light may be more gentle
2. It will be cooler (for you and the subject!)
3. The subject is likely to be less active
4. There will be fewer people or dogs likely to be tramping over your venue
That's it for now good hunting and happy shooting and please never forget there are many natural history guidelines but there is one golden rule:
The welfare of the subject is always paramount to the needs of the photographer.

B.P.P.A. LIMITED
The Society of International Nature and Wildlife Photographers (SINWP)
Clwyd Chambers, Clwyd Street, Rhyl, Denbighshire, LL18 3LA, UK
Company Reg 0392 2894 | VAT number 790 4289 05
Tel: 01745 356935
Corporate Partners


Newsletter: Subscribe here
SINWP Bird Photographer of the Year
London Photography & Video Show - Europe's Largest 'All-Welcome' Photographic Convention | Partner Societies | Privacy