

articles/Nature/gainingtheedge
Gaining the Edge
by Paul Gallagher
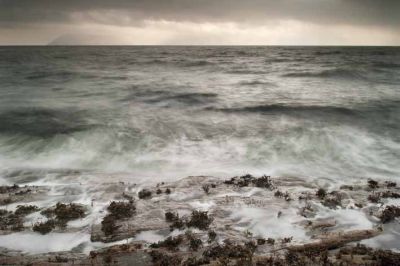
Having pursued photography almost entirely using large -format 5x4 for many years, the use of camera movements has become second nature. Now I am relishing the wonders of digital and colour, I have found that one of these movements I could not do without - lens tilt. Having tried stopping modern digital lenses down before, it is simply not the same as changing the plane of focus that a lens with tilt affords. Planning to venture out to one of my favourite short stretches of coastline in Scotland with my D700, I needed to remedy this concern and so, with the kind support of Nikon, I had to hand their 24mm PC-E (see callout for details).
Firstly let me describe my obsession with this location. I have been returning here for over 15 years and it never fails to fascinate me, whatever the weather. My 'secret spot' stretches from the tiny little Skipness Post Office until you reach the Claonaig Ferry terminal (only a small jetty!) where Caledonian Macbrayne Ferries take people over Lochranza on the Isle of Arran. As you follow this one-track road (the B8001) it closely nestles the water's edge of the Kilbrannan Sound, across which you get stunning views of Arran. The two main attractions are the crystal clear waters and the amazing geology, which presents itself as the sharp edges of a bedding plane, broken off and weathered like 'blades' of rock, with the occasional tidal-formed plateau closest to the water's edge.
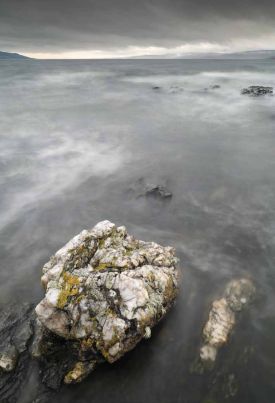
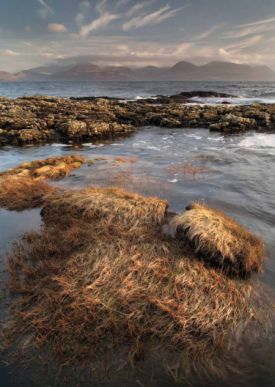
You have to be careful exploring this little coastline because the rocks, as well as being sharp in places, can be extremely slippery - the experience is not far removed from photographing on an ice-skating rink! That said, it is a place where I have spent many hours engrossed in my work. The waves can be ferocious at times threatening you and your camera kit, but the weather and light change rapidly as the waves crash and the retreating waters flow back to the Kilbrannan Sound, offering you a plethora of different images, as these two variables of nature co-exist. The area also supports amazing tidal grasses and rock pools further from the water's edge and the brightly coloured yellow and orange lichens on the rocks introduce startling colour when the environment becomes steely blue-grey as storms approach.
So what of the lens? I had some brief experiences with this lens about two years ago (August 2009), but because I had my large-format camera to hand this was often chosen to make the images, as opposed to the digital kit. On this trip I spoiled myself by carrying a bag half the weight of my 5x4 kit along, then allowed myself to 'see' the world in colour. Because of this, the digital kit, comprising my camera (Nikon D700) and the 24mm PC-E lens, soon became the standard as I worked.
With little effort I was making compositions and gradually dialling in the tilt to get the 'near-far' sharpness I needed using the Scheimflug Rule as I had done all my career. On my laptop that night the results proved that this lens could deliver. The images displayed the same characteristics that you would expect using 5x4 technique and they oozed quality, a 'like you are there' sharpness!
It is worth mentioning a couple of things at this stage. The small controls on the lens can be a bit fiddly but when you get used to them they do become intuitive. The locking nut for the tilt function is quite small, and the pressure button to rotate the lens through 45 degrees to change orientation from 'portrait' format to 'landscape' format is difficult to see, let alone use.
My other personal challenge was 'seeing' the adjustment through the little viewfinder. This will always be a challenge for the photographer coming down from 5x4.
It is worth mentioning a couple of things at this stage. The small controls on the lens can be a bit fiddly but when you get used to them they do become intuitive. The locking nut for the tilt function is quite small, and the pressure button to rotate the lens through 45 degrees to change orientation from 'portrait' format to 'landscape' format is difficult to see, let alone use. My other personal challenge was 'seeing' the adjustment through the little viewfinder. This will always be a challenge for the photographer coming down from 5x4. I am used to accurately assessing my adjustments on a large ground-glass, using a magnifying loupe, so a slow and considered approach is the order of the day, allowing your eyes to adjust to the change in focal plane.
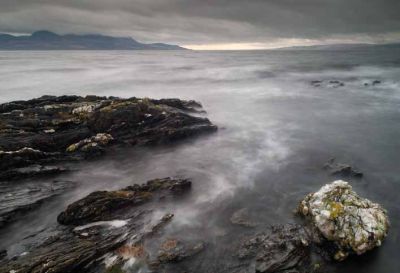
If you are using this lens remember three things: · Use a tripod (ludicrous to try without!) · You will almost never have to stop the lens down to below f13 · Dial in the tilt slowly and sparingly. One of the most common problems I have had teaching clients and students the Scheimflug Rule is they assume you have to 'crank it forward'! You don't! Between 1 and 2 degrees of tilt is all you will need for most applications with this lens even if the subject is close.
Conclusions? I am hooked! I can get used to the little controls and tiny viewfinder because the flexibility the DSLR offered to make my landscape images look 'real' again. It also makes this lens an essential piece of kit for the dedicated landscape photographer.
Focusing Procedure for a Tilt Shift Lens
1. Compose: Set lens to zero degrees tilt and frame the photograph
2. Identify: Identify critical nearest and furthest subjects along the subject plane
3. Focus: Focus at a distance which maximizes near and far subject sharpness in the viewfinder (if the far subject is at infinity, this distance will be at or near the hyperfocal distance). Once an approximate distance is identified, rock the focus ring back and forth slightly to get a better estimate of this distance.
4. Tilt: Very slowly apply progressively more lens tilt towards the subject plane until near and far subject sharpness is maximized in viewfinder. Once an approximate tilt angle is identified, slightly rotate the tilt knob back and forth to get a better estimate of this angle.
5. Refine: Repeat steps 3 and 4 with smaller changes than before to identify whether this improves both near and far subject sharpness; if no further improvement is seen then the focusing procedure is complete.
The Theory of Sharp (McNamee's little bit!)
This little paragraph is better coming from me rather than Paul - he blushes easily! While we were working at Focus on Imaging we had Paul's prints scattered about the Epson stand for the visitors to look at. A surprising number of people came up and asked if the prints had been made with special cameras and printed with specially prepared printers. We kept having to explain that Paul had used the relatively modest Nikon D700, the 24mm PC Nikkor and that the printers were 'straight from the box Epsons' - indeed some of the prints were the very first-offs, made as soon as the power became available on the Saturday. You could tell by their faces that they didn't always believe us, so we slightly adjusted my own talks and showed the as-shot RAW files and the sharpening techniques we had employed!
Optical Theory
For a 20-inch print viewed at normal distance the 'diffraction limited aperture' for a full-frame camera is around f13, ie if you stop down further than this, no additional sharpness will result - you are 'diffraction limited'. To maximise the depth of field the lens should be set at the hyperfocal distance (HFD). For a 24mm lens, the HFD at various apertures is as follows:
When a lens is set at the hyperfocal distance then everything from infinity down to half the HFD is sharply rendered. From the table you interpolate the HFD at f13 to 2.7m and so the closest focused distance is 1.4m (ie half of 2.7). For this reason a very modest amount of tilt is needed to tweak the sharpness of the foreground from the tripod set approximately 1.5m high. Paul, therefore, only used 1° of down tilt (or a little more when f11 was employed).
This near-perfect set-up, combined with the use of the tripod and superb optics resulted in the amazingly crisp RAW images from the D700. All that was left to do was to optimise the sharpening. When an image is as good as this a very light touch is needed for sharpening and we applied values at the lower end of the scales normally employed. The entire exercise is an example of the way painstaking craftsmanship results in unbelievable prints!

B.P.P.A. LIMITED
The Society of International Nature and Wildlife Photographers (SINWP)
Clwyd Chambers, Clwyd Street, Rhyl, Denbighshire, LL18 3LA, UK
Company Reg 0392 2894 | VAT number 790 4289 05
Tel: 01745 356935
Corporate Partners


Newsletter: Subscribe here
SINWP Bird Photographer of the Year
London Photography & Video Show - Europe's Largest 'All-Welcome' Photographic Convention | Partner Societies | Privacy