

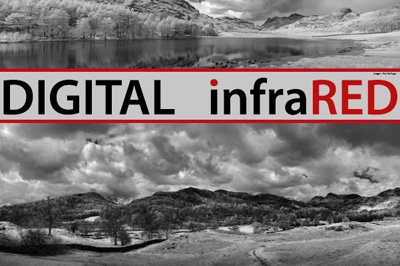
articles/Infrared/digitalinfrared
Digital Infrared
by Mike McNamee
Infrared (IR) photography has been around since it was 'invented' by Robert Williams Wood - indeed the ethereal glow that characterises IR images is named the Wood effect. Wood was a prolific scientist and inventor in the field of optics, mainly working in the ultra-violet part of the spectrum but also known for making astronomical telescope mirrors with revolving pools of mercury (no health and safety in his day!). He is also credited with Wood's metal which is an alloy of bismuth, lead, tin and cadmium which melts at 70°C and used for a variety of scientific and engineering purposes (the example of using it to fix multiple tool tips into the heads of metal-working machine tools is your editor's first acquaintance with the metal). He was an American and lived from 1868-1955.
Prior to the invention of digital imaging, IR photography was quite difficult and certainly quite unpredictable. The film had to be stored in a freezer, in aluminium foil, used in metal-only cameras, with metal shutter blades and processed in all-metal developing tanks. Any plastic in the workflow allowed fogging IR rays to penetrate to the film base. Initially IR was troublesome for digital imaging also, causing over -reddening of skin tones and , in some circumstances the ability to see through certain types of otherwise opaque clothing to the body or underwear beneath (this unintended consequence caused Sony to suspend distribution of a movie camera and remove it from the market in August 1998). It is the removal of the blocking filter and replacement with a narrow bandpass filter that converts a digital camera into a true IR-imaging camera. The huge benefit that digital brings is the ability to check and control exposure before leaving the location, all the hit and miss and careful workflow is eliminated in an instant!
And so it was that your editor found himself in the English Lake District 'assisting' on an Aspect2i infrared field course led by Paul Gallagher. Assisting consisted of providing a Manfrotto 303 VR head and a sturdy Manfrotto 535 Pro tripod to stand it on. ACS had kindly provided a couple of their IR-converted cameras and so the temptation to have a go at some personal work proved irresistible. While all this was going on there was an undercurrent of real work, testing both bags and clothing for the feature contained within these pages.
Images from delegates Paul Mills and Sheila Curzon are used in this feature and reflect the speed with which they caught on and the guidance provided by Paul Gallagher. Paul Mills made his first panorama ever (at any wavelength!); Sheila was a model of single-minded creativity. The boys sat in the sunshine putting the world to rights, wondering why she was spending so much tome in the cold water of Blea Tarn - the resulting image speaks for itself and few of the world's woes were settled! A little plug for Sheila's website - she manages www.letsgophoto.co.uk which is akin to a TripAdvisor for photographic holidays and is well worth exploring for anybody with an interest in such matters, either attending or teaching.

Lenses
The matter of lenses and hot spots in the IR range is complex. It is to do, in part, with len's element coating and internal reflections, and has little to do with cost or len's marque. Some classic lenses such as the Nikkor 12-24 f4 are unsuitable (although the 14-24mm f2.8 Nikkor is OK). The flaw, which manifests itself as a large flare spot in the image is both aperture and focal length dependent (in a zoom). It can often be eliminated with judicious use of an adjustment layer and mask in Photoshop. However, check the lists before you commit or you may find it essential to buy a new lens to attach to your newly converted camera body. A list may be found at:
http://dpanswers.com/content/irphoto_lenses.php which details lens hot spot issues (and a lack of them).
Exposure and Bit Depth
The IR filter in a camera rejects wavelengths below 720nm, only allowing wavelengths above that point to proceed to the sensor. This inherently results in a more restricted dynamic range, a situation that is even worse on a dull, overcast day. Despite this the overcast day is quite a good one for many IR images.
The question then arises, where do you centre your exposure and how should the ideal histogram be placed? The chances of a camera's TTL providing an accurate exposure are slight; manual setting is the order of the day! In the example shown, the histogram is reasonably centred, the 'dynamic range' extends from 31RGB points to 201RGB points. This was processed with 'zeroed' RAW settings, followed by a Levels adjustment in Photoshop, where the Alt key was used to reveal (and avoid) clipping at both ends of the scale. The process was carried out using both 8-bit and 16-bit images from the RAW file. Conversion to monochrome was made using Image>Adjust>Black&White. Alongside this the RAW file was processed in Adobe Camera RAW (ACR) using the Exposure slider and the Blacks slider along with the Alt key to reveal clipping points. Conversion to monochrome was then made using the ACR 'grayscale' conversion with default settings. The RAW-processed file was preferred visually, although the significantly higher image contrast might not suit every subject. The main issue with the workflow was the vulnerability to loss of bit depth and posterisation effects.

'Exposing to the right' is the accepted mantra for full spectrum imaging, but all advice on the subject for IR suggests avoiding over-exposure and a more centred histogram. In the image shown, with a centred histogram there are two stops 'going begging' before any sign of clipping in the highlights. This two stops represents 75% of the available bit-depth from a 12-bit capture system, 2,048 from the first stop and another 1,024 from the second stop, leaving just 1,024 for the remaining tones of the picture.
Sharpening
For the image shown, when processed all the way to inkjet print, including 'normal' sharpening levels, there were significant artefacts visible as square blocks (similar to JPEG artefacts but without JPEG compression being applied!), especially in the sky. This was processed in Photoshop for both curve adjustments and sharpening.
For many, IR sharpening will be slightly new (or at least revisited) territory with many older cameras being converted to IR as a way of extending their useful life. They are thus likely to have smaller pixel counts and as such require a slightly lighter touch during sharpening. Then there is the compressed bit-depth we have spoken of in the previous section. Smeared on top of all this is the optimisation required between ACR pre-sharpening and Photoshop sharpening prior to printing (usually for inkjet). We are, therefore into new territory and some experimentation will be required. Working in 16-bit is an obvious first step to alleviate some of the bit-depth issues.

We performed our standard ring around in 8-bit mode with a matrix of pre- and post-sharpening. Although the higher settings were grossly over-sharpened we failed to reproduce the blocking artefacts in this all-RAW route that had been produced by the Photoshop route. Initially at least this suggests that the RAW route is superior although we were taken aback by the outcome, expecting the heavy sharpening applied at the extreme corners of the ring around to reproduce the blocking effect. Life gets even more complex when Masking is brought into play both in Photoshop (over areas where sharpening is not required) or within ACR. Masking in ACR is carried out by use of the Details tab at 100% and holding down the Alt key, if you are unfamiliar with the method! This created a rather unusual 'filigree' mask in the sky (see screen grab) and although it will probably be invisible in the final print, it looks worthy of some additional investigation. Actually the whole shooting match seems to require quite a lot of investigation, a luxury unavailable at the present pre-deadline and magazine schedule!
RIGHT TOP: Images from IR show as a deep red, depending upon the variations in white balance, here we are in the process of applying pre-sharpening in the Details panel.
RIGHT BOTTOM: The mask slider is adjusted at 100% zoom with the Alt key depressed. Note the unusual patterns in the cloud. At 24% the sky is already substantially masked from pre-sharpening.

Despite this it would be remiss to conclude without at least some starting advice from which to springboard your own experiments. Here then is a possible workflow:
1. Shoot in manual mode in-camera, using RAW files and centring the exposure about 3/4 to the right but ensuring that there are no 'highlights flashing' in-camera.
2. Process in ACR using the Exposure and Blacks sliders to achieve sufficient 'punch' to the image, again ensuring that no clipping is occurring. Use 16-bit output.
3. Convert to Grayscale in ACR (before #2 if you prefer).
4. Apply sharpening of Amount 40, Radius 0.5, Detail of 80 and Masking to taste (looking to protect blank skies). This applies to 3,000 x 2,000 pixel images (in a Nikon D70 to be exact).
5. Open the image into Photoshop, then use multiple adjustment layers and masks to 'bend' the image creatively to taste. Four were used in the example shown.
6. Sharpen using a High Pass method and about 0.8-2.0 pixels radius. Then back off the opacity of the high pass layer probably to between 20% and 40%.
Now carefully check over the image and even if it looks OK on screen, make a test print. If it looks poor on screen it will almost certainly look awful in a print!
Overall then, the two days provided an excellent insight into IR photography. The rather mixed weather taught us a few things. IR can create images from visually unpromising material and you can continue to shoot even when the light in the visible spectrum would cause you to turn for home.

Tom Lee recently visited Monument Valley (see feature last issue) and took his ACS-modified D70 with him. We asked him to provide some images. Tom uses HDR in his workflow.
All were taken in Monument Valley earlier in March on a Nikon D70s, converted to IR.
Metering was in manual mode and several exposures were taken prior to bracketing three shots at one stop apart. The histograms showed that the highlight and shadow ends had no information - all the data were contained in the midtone regions (slightly biased toward the shadows).
Images were imported into Nik HDR Pro and the tone compression was adjusted, followed by overall exposure, using levels.

B.P.P.A. LIMITED
The Society of International Nature and Wildlife Photographers (SINWP)
Clwyd Chambers, Clwyd Street, Rhyl, Denbighshire, LL18 3LA, UK
Company Reg 0392 2894 | VAT number 790 4289 05
Tel: 01745 356935
Corporate Partners


Newsletter: Subscribe here
SINWP Bird Photographer of the Year
London Photography & Video Show - Europe's Largest 'All-Welcome' Photographic Convention | Partner Societies | Privacy